
With a little creativity and some grunt work, beautiful paths, patios and other projects can be made by recycling unwanted concrete into a urbanite, a useful building tool. Urbanite is a method of recycling concrete rubble into a myriad of uses, including flowerbeds, walkways, and patios.

I’ve always been planning to put a garden in next to the driveway but really dreaded having to dispose of the concrete. As soon as I learned about urbanite I knew I had a solution, as well as a source of garden paths. We broke up the concrete alongside our driveway and added another garden. The concrete pieces I used to create urbanite hardscapes throughout our property.
Related Posts:
- 11 Reasons Why You Need To Know About Permaculture
- Urban Permaculture Zone 4: Harvesting The Urban Landscape
- Hugelkultur: Colossal Garden Beds For Remarkable Results
- Can You Be a Homesteader In The City?
- 8 Ways To Save Money On Your Garbage Bill
Where Can You Get Urbanite?
One place to get urbanite is from old concrete on your property. My husband thinks he’s the Hulk, so we chose to break up the concrete with a pry bar and a sledge hammer. It might be a better idea to use jack hammer though! If you don’t have any on your own property broken concrete is usually available for free on craigslist or if you ask around.
If you need specific sizes or shapes you can use a chisel and hammer to more precisely cut your chunks of concrete. I chose to use the shapes already available. I think putting them together like a puzzle is fun.
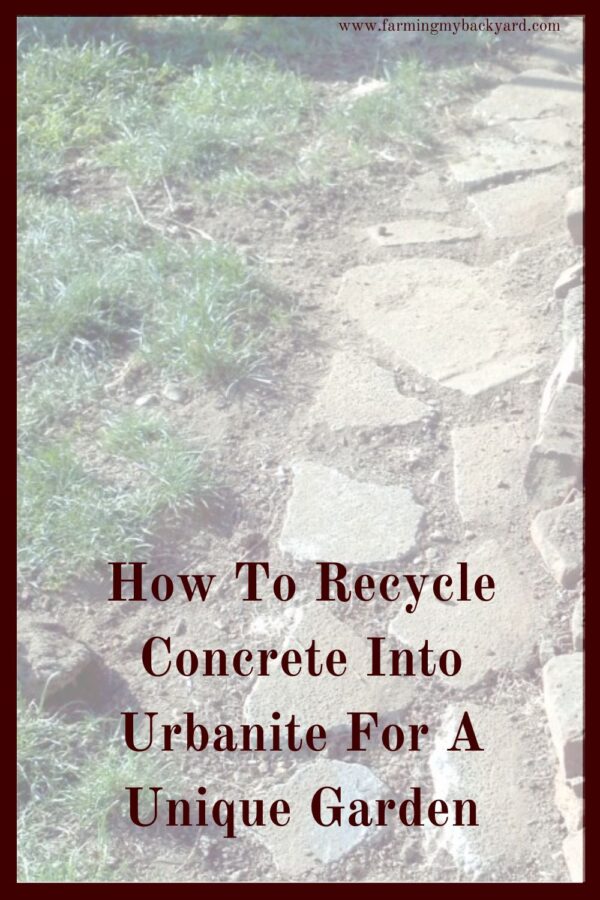
How To Make An Urbanite Path
Prepare to lay down your path or patio by digging deep enough to pour a sand and gravel base and still allow your urbanite to be at ground level. Because my budget is limited to free items, and I had no sand or gravel at hand, I chose to skip this step. My paths are a bit uneven but it still looks nice, especially once the grass and flowers along the edges of the bed filled in.
Level out your base and start laying stones. This is the fun part where you get to decide how it will look. I took my time and tried different stones in different places until I found what I liked best. If you’re not an artsy person, call a friend over to help you make your design!
Back fill any gaps between stones with soil removed when preparing the bed. This is a good time to put in any plant plugs you might be using. I decided to seed mine with grass seed and it’s starting to come in now. Other good choices would be creeping thyme or moss.
Really pack the earth in between the cracks so the stones don’t shift around. This will be less of a problem if you properly prepared with sand and gravel, but if you skipped that part like me than be prepared for some settling, especially after the first rain.
Sweep off your stones and enjoy your new path!
Make Other Projects With Urbanite!
I also used remaining stones to create a small bench on our front walk. I can sit there and watch the kids ride bikes. I’m planning to make a larger one in the backyard as well. Another use is making a small vertical wall to line garden beds. Urbanite could make some really gorgeous keyhold style raised beds if you have enough of it.
When making vertical projects, try to find stones that are similar in width. Variation in length can be useful. Lay down your largest blocks on your bottom layer. Start your next layer by offsetting the cracks to create stability. If you do a third layer or more continuing alternating the spacing so gaps between stones do not line up above or below each other.
That’s pretty much it! What about you? Have you put recycled concrete to use in your home or garden? Please share!
If you aren’t into building and are interested in a customized garden bed, check out Olle Gardens. Their galvanized steel bottomless garden beds in a variety of shapes, colors, and sizes. They’re designed to last for up to 20 years, resist rust and harsh weather, and of course they’re safe for planting! If you decide they’re right for you, use the discount code KATHRYN for a 10% discount!
Want To Raise Happy Chickens?
Subscribe for our newsletter and get the free email course Intro To Backyard Chickens as well as a free printable checklist to walk you through step by step!
Lela
Monday 30th of January 2023
Your path looks beautiful! I’ve been making walls, steps and paths this way for many years. I had never heard it called urbanite, just concrete rubble. Learned something new! Some of my earliest projects (10- 15 years) have been well colonized by mosses, lichens and such, as well as naturalized plantings. I live in a very damp, forested area, so this helps. I’m very happy with how they have aged. I have never laid a proper base, but have been careful to remove all weeds and their roots, and tamp and level the soil well. As I backfill soil between the pieces, I pack it in as tight as possible, and mist periodically with the hose as I go. The rains do still cause a little settling, and a few weeds do still grow. But for the most part, they still look pretty good. I think the key is taking your time, and being thorough. No need to spend a lot of money!
Kathryn
Tuesday 31st of January 2023
Thank you! The moss and lichen sounds gorgeous :D
Johanna
Monday 9th of September 2019
I have two large raised beds made this way. Warning you end up with weeds and invasives in the stacked concrete blocks. It may look pretty but the blue bells are almost impossible to remove(I wouldn't bother but the stiff fine of $1000.00 makes it necessary.) I'm thinking of dismantling them and using a wooden sides held together with aluminum strips to keep them together in an octagon shape. the alternative is to cement all the concrete together leaving no room for the weed roots to infiltrate. It's a pity because it looks nice.
Kathryn
Tuesday 10th of September 2019
Oh bummer! Down here everyone loves the bluebells, but they aren't invasive where I am.
Toni
Thursday 7th of December 2017
I love the look of your final product - very pretty! It is surprising though, that the kids did not have any kind of protective gear - bits of concrete can go flying. Safety goggles protect vision and I hope that folks trying this at home will use them. Thanks so much for all the great garden ideas! Do you have any thoughts of recycling old toilets? I'm trying to find a way to re-purpose the tank. Best wishes!
Kathryn
Thursday 7th of December 2017
Thanks! The kids were watching from far away when we were doing the sledgehammering, but they really wanted to "help" so I took some pictures of them out there with a rubber mallet. :D DEFINITELY want to wear eye protection when breaking up concrete!
Sorry, I'm not aware of any great strategies for toilets. I believe commercial recycling programs crush them up and use the porcelain in concrete though.
Laura
Friday 2nd of September 2016
That looks really nice! I used busted cinderblock to edge a garden bed. Honestly, it's not as pretty as yours, though. Your pathways look great! Good job.
Kathryn @ Farming My Backyard
Tuesday 6th of September 2016
Thanks! That's cool you used it for a garden bed! You could always plant something that trails down the edge as a border too.
patricia stevens
Thursday 19th of November 2015
I like your ingenuity-- it is inspiring. Thinking of purchasing a home on a decent sized lot which has a huge slab of concrete - in front currently being used as a basketballcourt. I thought of breaking up the concrete to use in the garden and found you on online. Thank you for sharing!
Kathryn @ Farming My Backyard
Friday 20th of November 2015
Oh exciting, all the possibilities! Congratulations on a new house!