
A root cellar is so incredibly useful, especially if you are trying to store a year’s worth of food that you’ve grown yourself. But what can you do if you don’t have a root cellar? Here are some ideas that you can utilize no matter the size of your homestead.

Why Do I Need A Root Cellar?
Root cellars come from an era where most homes came with a cellar or basement, and people stored their root crops there. Now many homes have only one story, and may even lack a pantry in the kitchen. (Which is sad. Pantries are awesome.)
While nowadays we all have refrigerators, (sometimes more than one!) being able to store your food for long periods without additional energy helps you become more resilient and prepared for any situation. It is a skill set that you may never know when you might need it.
There’s also a sense of satisfaction to being able to take ownership of your most basic need for food by growing, preserving, and storing your own. Even if you can’t grow everything yourself, it allows you to save money by taking advantage of abundance when those foods are in season. This can help you eat more locally and rely less on foods shipped over great distances.
Tips For Storing Food Without A Root Cellar
Even if you don’t have a root cellar, you can help fresh food last longer in your kitchen. If the item has a stem, leave it on. Store fresh produce with plenty of ventilation. Things like mesh bags, cardboard boxes with holes, laundry baskets, burlap bags, and baskets all work great for this. If you can, try to keep produce in dark places.
You can also select late maturing crops for your storage. Plant “keeper” varieties in your garden, or buy them when you can find them! Also make sure you check regularly for spoilage. You’ll want to use any items that have bruises or imperfections first as they will be the first to spoil. If you’re bringing in produce straight from your garden, wipe off the excess dirt but do not wash them until it’s time to cook it.
If you just have a pantry or cupboard, it’s likely to be low humidity and at a temperature of 45 to 60 degrees. These conditions will work well for storing dry beans for about 2 years. Both garlic and sweet potatoes can last up to 1 year. Onions, potatoes, and winter squash will last about 6 months, with pumpkins retaining their quality for about 3 months.
Tips For Hot Climates
If you live in a place that’s just to hot for any of these tips (like Texas!), a second fridge is a reasonable option, especially if you are running it on solar energy. It’s also likely that you could grow your own produce year round, thus eliminating the need to store food for long periods of time.
The main issue with refrigerators is that they have very low humidity. If you have a dedicated “root cellar fridge” you can pack your vegetables into boxes of damp sand or even take out the shelves to utilize all the space. There are also walk in coolers you can buy ready made to install in your home.
Repurpose Other Spaces In Your Home
If you have a basement, you’ve pretty much got it made! For those with you with an already finished basement, you can still take a corner of your basement and frame it out with shelves and a door so that it stays nice and cool.
If you live in a cold area, a simple shed can easily be converted into a root cellar. Add pallets on the floor for plenty of air flow and store boxes or baskets on top of the pallets. You may need to take a little extra time and make sure no rodents can get inside. Plug up holes with steel wool or caulk.
Closets in cool areas of your home can work well too, especially if on an exterior wall. Under the stairs can be a popular spot to convert to food storage as they are frequently dark, cool, and not terribly useful otherwise. Attics and garages can also be serviceable in cold areas. Ideally you want temperatures of about 32 to 40 degrees, but as warm as 50 is okay.
If you live in a hot area, you can use an air conditioner to create root cellar conditions in your own home. You can insulate a root cellar space very well with all four sides and ceiling with polystyrene foam sheets or even build the walls with structural insulated panels. You will need to connect your air conditioner to a Cool Bot so that it cools enough.
Build Your Own Root Cellar
You may not have a space already available for storing your own food, or perhaps you are lucky and skilled enough to grow enough food that you need a dedicated root cellar for storing it. If that’s the case, you may want to consider building your own root cellar.
Sometimes people can enclose under their porch as a basic DIY root cellar. If you live in a tornado prone area, you may be able to build a safe room that doubles well as a root cellar.
Insulation and water proofing will be crucial in any homemade root cellar. There are paintable waterproof membranes you can put right onto concrete with a brush. However, you will also want to examine options you can use outside your home to change how water drains away from your home. There are many options for insulation, and once you’ve applied it to the walls and ceilings, you can also fill any small gaps with spray foam insulation. Once you’ve applied insulation, green board is a water resistant drywall product that can be an attractive and paintable layer for your root cellar.
Even if your root cellar is indoors or in a basement, use an exterior door for better temperature control. Or if you really like the door you have, add rigid foam insulation on the inside of it. Lever door knobs are easier to operate with your hands full, which is a nice detail to include if you’re designing from scratch. Also, a light switch on the outside of your root cellar is useful and helps you make sure the light is off while still maintaining the temperature.
Ventilation is Crucial!
Make sure to include ventilation, even if it as simple as PVC intake and exhaust pipes. By varying the height you create air flow. An intake pipe should go from the top of the building to just above the floor to bring in cooler air. Place an exhaust pipe flush with the top of the cellar.
Venting is essential, but make sure you can close them as needed, especially if you live in warm humid areas in the summer. You may need to buy or rent a rotary hammer if you are going through an existing cement wall. If you have a basement window you can remove the glass and replace it with exterior grade plywood and polystyrene foam that you run your ducting through. Make sure to seal around the edges of the pipes!
Cellars have natural variations in temperature with lower areas being cooler and higher areas being warmer, so you can store your warmer loving crops higher up on your shelves. You can use a digital thermometer and hygrometer to measure your humidity levels and keep them from getting too high and causing rot and spoiling. Around 90 percent is ideal and you can keep squashes and other low humidity preferring crops elsewhere or nearer the ceiling.
Keep Pests Out
Blast gates are used in woodworking shops and work great as vents for root cellars. You’ll also want to include screens with galvanized hardware cloth of at least 1/4 inch mesh to keep out rodents. Add a layer of window screen as well to keep out flies and mosquitoes.
The work you do to prepare a root cellar with foam insulation, weatherstripping and other activities also prevents rodents from snacking on your stored food! But you’ll want to make sure to always screen any vents! Insects and moths are rarely an issue if it’s cool and humid enough. (If you do have any sort of infestation, remove the source and clean the area.)
You Can Build Your Own Stand Alone Root Cellar
Digging down to build a stand alone root cellar is a good idea if you have an area with good drainage and you don’t live in an area with clay soil. You’ll want to make sure you do not site it near a septic system as well.
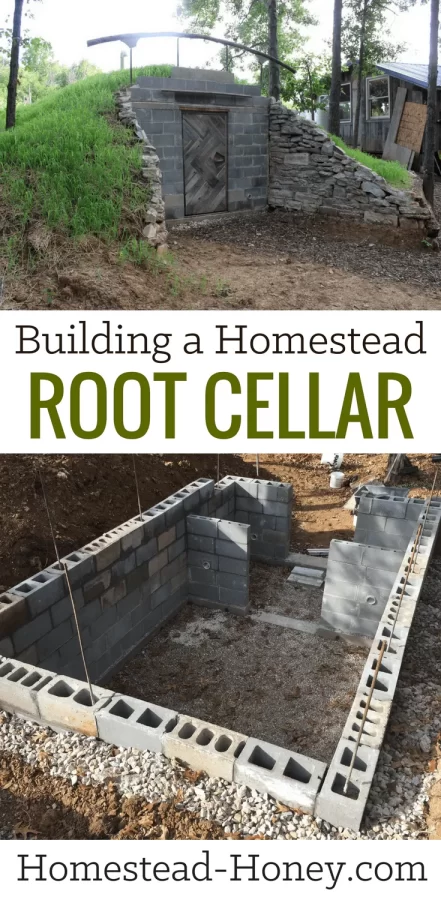
Homestead Honey was a wonderful ebook that will walk you through building your own earth sheltered root cellar with cinder blocks. It’s a big undertaking, but if you have a traditional homestead with the space for it, it’s a great project that will be used for years to come.
Root Cellaring Right In The Garden
You can also store your produce right in the garden! There are a couple different methods to do this. You can make a miniature root cellar, or you can use the dirt itself as your root cellar!
After the first frost, you can store several crops right in place by piling organic matter on top of them to insulate the soil. Good options include straw, sawdust, and leaves. Good crops for this technique include beets, Brussels sprouts, carrots, cabbages, endive, Jerusalem artichokes, kale, leeks, and parsnips. However, if you harvest your vegetables and they have frozen solid while stored like this, it’s too cold in your area to use this technique.
How To Make A Trench Root Cellar
You can also dig a trench 6 to 10 inches deep and 18 to 24 inches wide and place root crops together with their tops still attached. Next, replace the soil above them up to 6 to 10 inches tall with their tops slightly above the soil. This gets them deeper underground and better protected from freezing.
You can harvest as needed throughout the winter. If you can’t dig the soil in the trench because the ground is too frozen, you can still harvest these plants in the spring. You can also add a thick layer of organic matter on top of your trench for even more protection. If you have deer in your area, you may need to also protect this area with a fence, as they will be quite happy to find your stored food as a little winter snack.
How To Build A Root Clamp
A root clamp is a pile of vegetables stored in the garden on top of the ground. Pile them on 6 to 8 inches of clean straw, cover the pile with more straw (also about 6 to 8 inches), then pack 6 to 8 soil on top of everything. Make sure to add “tunnels” of straw every couple feet to allow ventilation from the bottom, and leave “chimneys” of straw near the top for escaping gases. If it’s rainy, cover the straw chimneys with flat rocks or boards.
How To Make The Easiest DIY Root Cellar
The simplest DIY root cellar is a simple pit cellar. This is a good option in sandy soil that is well drained. You’ll need to flare the sides out as you dig so it doesn’t collapse on itself and line the sides with straw or dried leaves. Cover the hole with at least 3/4 inch wood and soil on top of that as well. Five gallon buckets and coolers can be buried as well.
If it’s very wet, you can bury a galvanized metal trash can will help with moisture. Add insulated foam and 3/4 inch plywood across the top, and weight the lid down with a rock or cement block. A tight fitting lid will keep any unwanted critters out of your stored food. (Make sure to put straw between any layers!) In very wet locations you can cover everything with tarp as well. You can also add a simple PVC pipe for venting the ethylene gasses that can cause spoiling.
You can even make a root cellar pit in your dirt floor basement or crawl space by digging holes and lining them with sheet metal boxes with sturdy lids! There are so many creative options available!
How To Store Specific Crops
Part of successfully storing your own food in a root cellar is knowing how to harvest and store each crop appropriately. Understanding what each type of food needs for storage conditions is a good skill that can help you no matter if you are using a kitchen cupboard or the nicest custom built root cellar.
Harvest Vegetables For Storage Carefully
If digging produce in your garden to store, dig from the side so you don’t accidentally damage the skin. Don’t store any produce that is dented, scratched, broken, or bruised as it will decay quickly. Put the best produce in the back to be eaten last as it will last the longest. Eat smaller or damaged first or use another preservation technique like drying or freezing. If anything has decay, remove it immediately or it can cause everything around it to rot as well.
Manage Your Root Cellar’s Conditions
Keep roots cellars dark as light can promote sprouting. You’ll also want to keep it very clean. Clean all containers in the summer and regularly examine any wood containers for rot or decay.
To monitor your humidity levels you can place three hygrometers in your root cellar space. Place one at the floor, one in the middle, and one at the ceiling. This will help you know what the temperature and humidity of each area is.
If you need a very high humidity place in your root cellar, make a sand can by layering damp sand and root vegetables in a metal can with the lid closed or only slightly open. You can reuse the sand by digging into another can as you unearth your food.
What Vegetables Need Cold Moist Storage?
Cold and moist preferring vegetables last the longest in temperatures of 32 to 40 degrees. They also need very high humidity and may even need to be packed into containers of damp sand. These are also good crops to store directly in the ground of your garden. These include beets, carrots, turnips, radishes, rutabagas, and celery.
Remove the green tops from beets, carrots, and parsnips. Beet and parsnips should last 2 to 4 months. Carrots may last up to 6 months.
Grapefruit, oranges, tangerines, and pears will also last for about two months at 32 to 40 degrees and 80 to 90 percent humidity. But make sure to check them regularly and remove anything with soft spots or mold on the rind. Pears should be wrapped individually in newspaper.
What Vegetables Need Cold Dry Storage?
Several fruits and vegetables store best with cold and dry conditions. Keep them at 32 to 40 degrees and at about 60 percent humidity. These are ideal conditions for apples, cabbage, Brussels sprouts and potatoes. Make sure to store your apples separately though, as they give of ethylene gas which will decay other produce and cause potatoes to sprout.
Apples should be individually wrapped in newspaper and placed in cardboard boxes. Pears can also be stored here if you don’t have enough cold and moist storage conditions available. Cabbages should also be individually wrapped. Make sure to store cabbages far away from other produce, (including apples). They will last 3 to 4 months.
Brussels sprouts are best harvested after their first frost exposure. Dig up the whole plant and place it in a bucket in your root cellar. They should last about 4 to 6 weeks.
Potatoes need to cure after being harvested. Keep them at 45 to 60 degrees for 1 to 2 weeks. They can then be stored at 40 to 45 degrees for up to 6 months. Paper bags are best for storing potatoes as they can breath. You can even use large ones intended for leaf collection.
What Vegetables Need Cool and Dry Storage?
Onions, garlic, and shallots do best at about 40 to 50 degrees with humidity under 60 percent. They generally last for 6 to 8 months.
You can also store dried beans, grains, fresh unwashed eggs, hard cheeses, cured meats, dried fruits, and nuts and seeds in your root cellars. These all need low humidity and are fine stored with onions and garlic. You can even dehydrate some of these yourself!
Here are some posts that you may find useful:
Here Are The Fundamentals Of Dehydrating Foods Without Electricity
How To Dehydrate Food Without A Dehydrator
How To Dehydrate Hamburger And Make Hamburger Rocks
Preserving Meat Without Canning Or Freezing by Making Oven Jerky
3 Popular Ways of Preserving Garlic From Your Garden
What Vegetables Need Warm and Dry Storage?
Warm and dry and dry storage is 50 to 60 degrees and under 60 percent humidity. These are the conditions you should store sweet potatoes, pumpkins, and winter squash. They will need good air circulation, but will last 4 to 6 months. These are ideal for storing in unused spaces of your home such as spare closets, under beds, or even on basement staircases.
Hopefully this post has given you some ideas on how to store your homegrown produce in your home. You may be able to use spaces you already have. You may need to put some effort into creating your own root cellar or similar space. Or perhaps you may even store your harvest right in the garden! But regardless of what methods work for you, being able to properly store your own food without a root cellar is a great skill to have.
Sources:
The Imperfectly Happy Home: Root Cellar Alternatives
Common Sense Home: How To Build And Use A Root Cellar
Practical Self Reliance: Beginners Guide To Root Cellaring (Without Root Cellar!)
Almanac: Storing Your Harvest Without A Root Cellar
The Complete Root Cellar Book by Steve Maxwell and Jennifer MacKenzie
The Joy of Keeping A Root Cellar by Jennifer Megyesi
Root Cellaring: Natural Cold Storage of Fruits & Vegetables by Mike and Nancy Bubel
Want To Raise Happy Chickens?
Subscribe for our newsletter and get the free email course Intro To Backyard Chickens as well as a free printable checklist to walk you through step by step!