Making a pallet planter is a quick way to increase the vertical planting space in your garden. If you find free or cheap pallets it’s much cheaper than purchasing any sort of planter system at the store. You may even be able to find the landscape cloth cheap too.

I used some that was used at our house by previous owners. We had pulled it up to put in the garden and instead of throwing it away, repurposed it into vertical growing space! Pallet planters can be a fun way of working in a little more gardening space to a patio or rental property.
Here’s how to make a pallet planter:
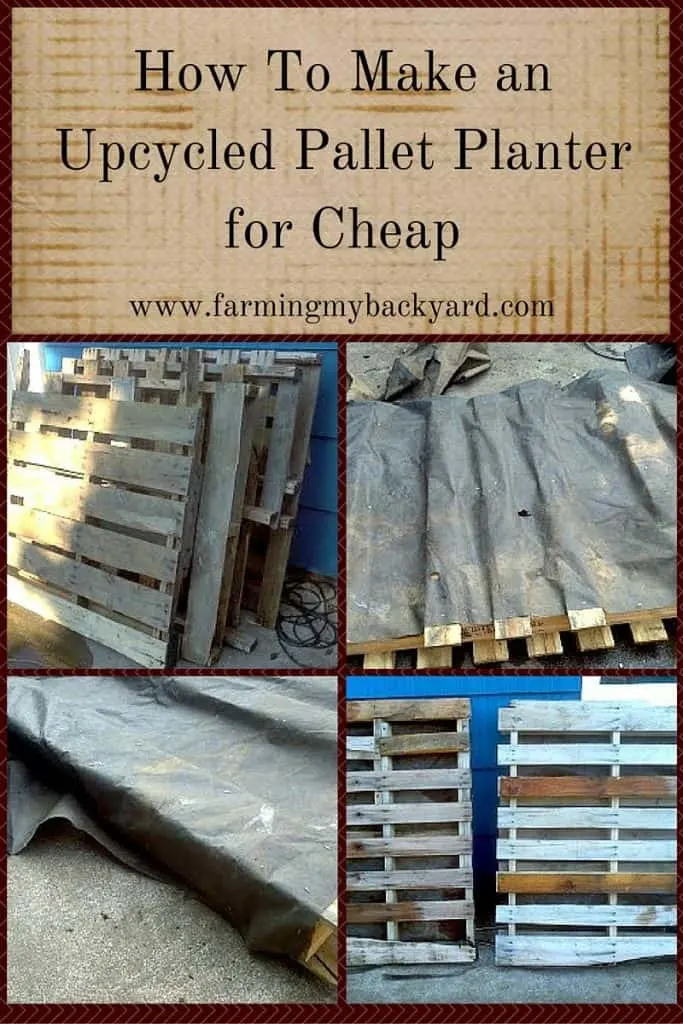
- Find pallets. These can be found on the side of the road, in dumpsters, or on craigslist. Businesses also give them away, but make sure you ask first as some will re-use them.
- Cover the back of the pallet with landscape cloth and staple it down securely. Not sure what landscape cloth is, or can’t find any to reuse? You can buy landscape cloth here. Staple the cloth across the bottom. Make sure the bottom is well stapled; you do not want your dirt and plants to fall out the first time you stand it up!
- If you want to paint them fun colors do it now, and wait until they dry.
- Fill your planters with potting soil, or a mix of soil and compost.
- Plant into the spaces between the slats. Strawberries and herbs are a good choice. Plant them closely to cover as much of the space as possible.
- Water them! You don’t want thirsty plants!
- Leave the pallets lying horizontal for a few days to allow your plants to root securely.
- Stand up the pallets where you want them! Make sure to water frequently, as pallet planters can dry out quickly in hot weather.
- Enjoy your new garden!
And there you have it, a cheap and easy project that will expand your garden space and can be taken with you if you have to move. Yay for more strawberries! Have any landscaping cloth left over? Try making some potting bags and planting some raspberries or other shrubs!

Want To Raise Happy Chickens?
Subscribe for our newsletter and get the free email course Intro To Backyard Chickens as well as a free printable checklist to walk you through step by step!

Barbara R Eubanks
Monday 12th of July 2021
Would like a picture of your finished planter
Kathryn
Monday 12th of July 2021
We have since moved, and I wasn't able to find a past photo, but this image is very similar: https://bloximages.newyork1.vip.townnews.com/journalnow.com/content/tncms/assets/v3/editorial/1/c5/1c540d96-bb0c-5e24-9a03-6f0ea055095f/5cddb4a6392e7.image.jpg?resize=1200%2C1510
Deborah
Thursday 26th of December 2019
Pictures or maybe a video sure would be helpful in understanding what your trying to explain. I know I am a more visual person in learning new things. Thanks
Kathryn
Wednesday 1st of January 2020
Thanks for the recommendation. I will look into redoing this and making a video!
Kathryn
Friday 13th of September 2019
Staple landscape fabric to the back of your pallets. Flip them over and fill with potting soil and plants. Once the plants are established you can lean the pallet up against a wall to save space.
Kam
Thursday 12th of September 2019
please show the video on how to plant in pallets. I am confused
Riesah Prock
Monday 9th of September 2019
Hi, Some photos would be helpful to understand your instructions. Thanks
Kathryn
Tuesday 10th of September 2019
Was there any particular part that hard to understand?